
Old furniture is great. You have endless opportunities to redo it the way you desire and need. Often, those dated pieces of furniture were made with good craftsmanship, using quality materials, and it would be a shame to toss them away just because the knobs and varnish are out of fashion. You can uncover the hidden charms of old pieces with just a bit of creative thinking and elbow grease.
To help you out a little, we have come up with ten easy ideas — from half-an-hour fixes to a weekend-long projects — that will not only help you create something original and unique but certainly also save you a dollar or two.
The Knit Chair
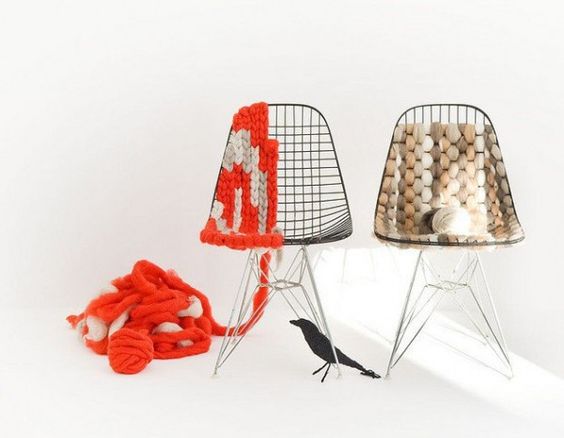
The wire chair, Eames or no-name, is a mid-century classic. There is something striking and beautiful at the same time about its simplicity, comfort, and variability. The wire chair was a staple of the the '50s, and chances are, there is at least one of these chairs in your home today. If you no longer feel good about its industrial appearance, you can turn it into soft, cozy, one-of-a kind piece. Are you asking how?
Artist Akira Ishikawa was the first one to remodel the staple Eames chairs by applying basic knitting and weaving techniques. You do not have to be an experienced knitter to achieve similar results. All you need is a thick yarn or fabric strips of your choice and you can start playing around with different patterns and techniques. The biggest plus of this project is that you can never go wrong. It is a great project to start with and up build your confidence from.

Akira Ishikawa's twist on Eames chair
The Rug Lamp Project
If we were to mention just one person who, in terms of up-cycling, kills it every single time, it would be Annaleena Hem. She is a Scandinavian interior blogger and a part-time DIY-er. She is helping to spread the the word about interesting Scandi designers and she let us take a sneak peak into the beautiful homes she had a chance to visit.
Homemade rug lamp is one of her projects - it's very easy to make and it complements serene and modern apartments beautifully since it looks very organic and natural. All you need is a lampshade, fabric strips (preferably white, but any colour would do), and some wooden beads for decoration.
Start by ripping off the old fabric from the metal frame. Once that is done, you can spray-paint the shade to your desired colour or leave it as it is. Then start tying the fabric strips on the construction. You can knot the strips sparsely or one by one — whatever floats your boat, really. Some ends can hang loosely and others can be tied back to the frame. Fixing a wooden bead on the fabric ends will decorate the lamp nicely.

The Rug Lamp

Lift That Sofa Up
Impulse-buys. Yes, we all have at least one or two pieces that we could easily live without, but at that moment, it felt like the best purchase of our lives. You are lucky if it was shoes or another shirt, but what if we bought something bigger? Something like sofa or a bed? If you do not feel that good about your old IKEA couch anymore, we have a quick, less-than-45-minute solution for you. The solution is called "furniture legs" by Prettypegs.
What do they do? They simply lift your furniture of the ground. Prettypegs offers a jaw-dropping selection of furniture legs that will do wonders with your slouching couches. All you have to do is choose the legs and screw them in at the bottom of your sofa, bed, shelf, or cabinet. You can turn an old, boring piece of furniture into a hip and modern, enviable one-of-a-kind.

Palette Bed
Finding the right bed can be a nightmare with all the choices we have today. Many people decide to go simply with a mattress they put on the floor until they find a bed frame they like. More often than not, a temporary solution slowly transitions into more of a permanent one. Sleeping closer to the ground feels very natural, and it comes as no surprise that the number of people preferring this arrangement is increasing.
However, a mattress needs to "breathe," and putting it on the floor will prevent the air from circulating and turn a mattress into a dust mite heaven. Lifting the mattress slightly of the ground means having your cake and eating it too.
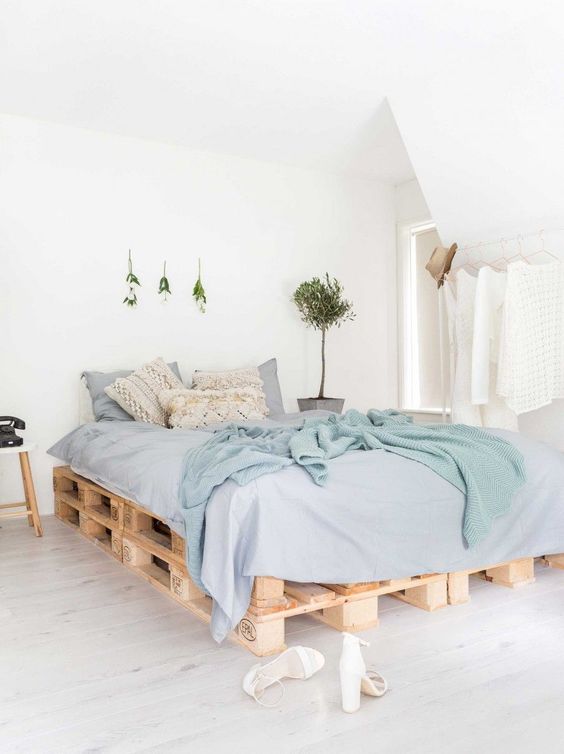
Industrial palettes offer a great, stylish, and affordable solution. They are strong and sturdy and allow air to circulate around the mattress. A pallet bed can be a temporary solution before you find the right bed. Maybe you will love it as much as the thousands of other people and would not change it for anything else.
Pallet bed construction is easy. All you need is a couple pallets, depending on the size of your bed, several sandpaper sheets, and a a clear wood wax. We recommend washing the pallets, letting them dry, and using sandpaper to smooth any rough surface. Two coats of wax will make the pallets more resistant to dust and dirt while preserving the raw wood look. You can paint the pallets if you like. Once the top coat is dry, screw the pallets together and put a mattress on top to enjoy your new, eco-friendly, up-cycled bed.
Easy Shelf Units
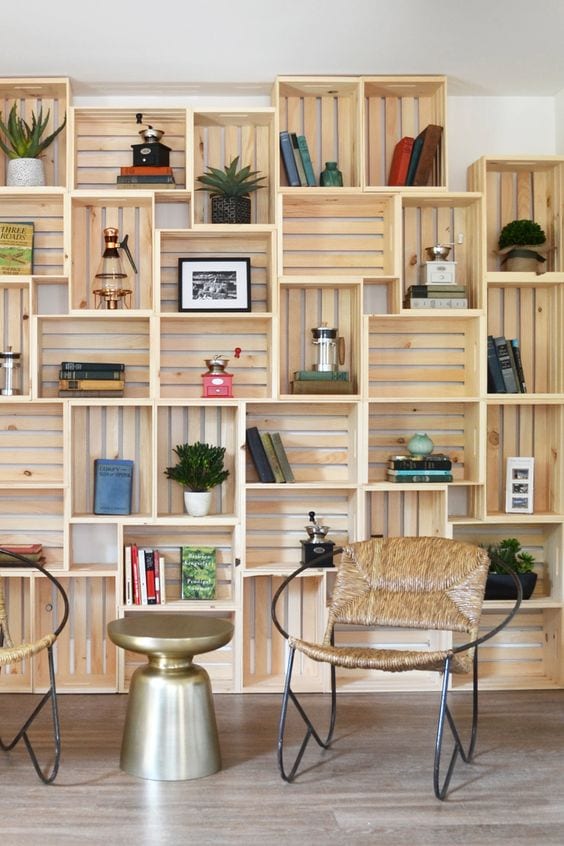
Raw wood is such a beautiful material that we decided to dedicate another DIY project to it. This time, wooden crates from farmers markets will come in handy. They come in various shapes and sizes and you will certainly find some in your basement.
All you need for the project are wooden crates, sandpaper, a bucket of paint of your choice, wood wax, and chair legs (you can either recycle legs from a chair that you no longer use or buy replacement legs from any home improvement store). Start by smoothing the rough parts of the wood with sandpaper, and once you are done, wipe the crates with a damp cloth to remove all the dust. Let it dry and apply wax or paint, depending on your preference. As soon as the top coat dries, you are ready to start screwing the crates together. Once you are done, you can fix the chair legs to the bottom and you'll have your own original piece of furniture!
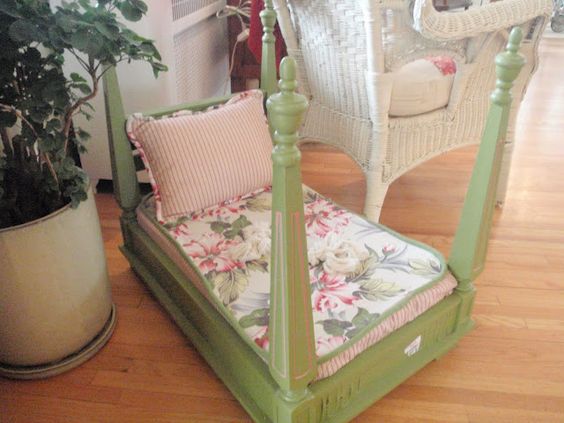
Pet Canopy Bed
The following project is simply genius! It is one of those ideas that will make you ask yourself why you never came up with it yourself. Well, we have been asking the same. The pet canopy bed you see in the picture below is made from a dining table that was turned upside down and painted. Ingenious, don't you think?
The only trick is to find a table with beautiful legs — the more ornate, the better. If you don't have this kind of table, you can purchase replacement legs in a home improvement store and swap them with the simple ones. You can use those for the crate shelf project we discussed above. Once you have replaced the legs, paint the table with your desired hue and cut a mattress to fit. The canopy bed itself sits directly on the floor, and this makes it easy for a pet to get into and out of bed on their own.
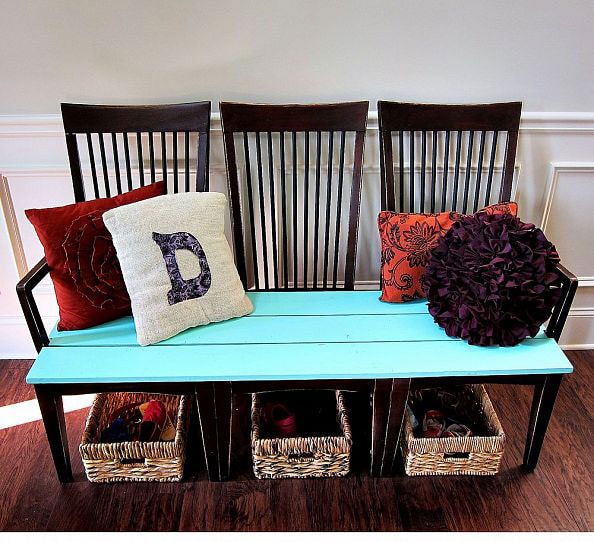
Chair Bench
The chair bench project is a great way to use various chairs that have found their way into your house over the past 20 years. Are they are all different? It does not matter at all. On the contrary, the more diverse the chairs, the better.
All you need for the project is a screwdriver, a handful of nails and screws, a bucket of paint, and a wooden shelf you can easily buy at any home improvement store. Start by unscrewing the seats from the chair backs and legs. If the screws are alright, save them and use them later. Measure each chair back and add approximately 4 inches to each side. Cut the wooden plank or shelf to size.
Here comes the most difficult part — positioning the chair backs, plank, and legs so they all meet and can be screwed together. This requires a great deal of patience and precision. Once you have mounted all pieces back together, you can paint or wax the bench. We recommend not skipping this step if you intend to place the bench outside.
Mass-produced With a Soul
While most people turn to up-cycling tutorials and project books hoping to breathe a fresh air into old pieces, there are certainly many creatives who would love to personalize a mass-produced piece of furniture. When a change of colour is not enough and legs do not seem to do justice, we offer another solution — a change of texture.
In the picture below is the classic Expedit shelving unit from IKEA with a completely new finish. You can benefit from the versatility of the Expedit units while enjoying a piece that doesn't resemble IKEA at all. All you will need are wooden planks, four wheels, a handful of nails, and a hammer. Instead of smooth wooden planks, you can use wood from a disassembled wooden palette if you like the appearance of rough, raw wood. Measure the lengths and cut pieces to size, then use long, thin nails to fix the plank on the unit. In most cases, you won't be able to see the nails. Once the whole unit is covered with wood planks, mount wheels at the bottom and flip the shelf upside down.

Expedit Cupboard Doors by Marceline Smith
Old Shelves into a New Closet
The last project from our "Trash to Treasure" series will turn two neglected bookshelves into a dream closet. Investing in expensive, made-to-measure systems is unnecessary.
Simply mount two bookshelves on opposite ends of the wall, facing towards you. Measure the distance between them and get a wooden rod or a stainless steel tube from a home depot store. Mount the one or two rods in between the shelves, and voilà! You are done! You can pain the pieces to match or leave them as they are.

Closet from bookcase project by Rxreppin

KK00SK