

Do-it-yourselfers, rejoice! May is upon us, which means that it's the best time to perform home inspection. If you can afford to hire a professional, there's no easier way to get the job done and get it done right. However, if you want to save some money for the coming spring season, you can conduct your own inspection. All you have to do is read the following advice and assemble a pen, paper, and a flashlight and your home inspection can begin.

The Attic by thesoupboy
You alone know what repairs you can really do yourself. However, if you're not sure if your skills are sufficient, call a professional repair person or building contractor. The following tips can help you choose the right person for the job.
- Get recommendations from your neighbours who have had similar work satisfactorily completed, from your real estate agent, from the local utility company, or from listings in the Yellow Pages.
- Call two or three contractors for competitive estimates and get the estimates in writing, detailing the work to be done, materials to be used, and total cost.
- Avoid door-to-door solicitors for repair or remodelling work. Reputable contractors do not resort to this business practice.
- Ask to examine two or three previous jobs done by the firm or individual.
- Before making your final choice, call your local Better Business Bureau to check on contractors' "customer satisfaction rating." This can tell you whether significant or frequent complaints have been lodged against a contractor.
- Be sure about what you want done and how you want the finished product to look before you begin. Once the repair work starts, changing your mind or altering the agreement can cost many extra dollars.
Hiring someone with a good reputation is probably the safest way to avoid problems. However, it's definitely not the cheapest approach. The good news is that you can easily do a home inspection yourself.
Where should you start? This is a difficult question, but it's advisable to start with your home's most visible imperfections — the exterior.
Bad Shingles
Each kind of roof surfacing material is different, and therefore life expectancy varies greatly. Asphalt strip shingles, double-coverage asphalt roll roofing, single-coverage roll roofing, built-up roofing, wood shingles, metal, fibreglass, and rubber membrane are all used as roofing materials. The asphalt strip shingles and metal roofing are typically used on higher-pitch roof surfaces. Roll roofing, built-up roofing, and membranes are generally found on lower-pitch or flat roof surfaces. A number of factors can accelerate the ageing process of asphalt shingles. For example, if a roof surface faces south, the shingles have a tendency to wear out faster. Shingles applied over well-ventilated roof structures tend to last longer than shingles applied over sheathing in contact with insulation.

Shingles by calliope
One of the most common defects found with asphalt shingles is improper nailing, when shingles are either overdriven or improperly located, and deteriorated asphalt. If your shingles are made of wood, be sure to check for rot, heavy lichen, moss, and missing shingles. Metal roofing should be checked for rust and corrosion as well as cracks.
Don't forget to check the condition of your chimney and chimney flashing as well the condition of the mortar and bricks. Chimneys that are over 30 inches wide should include chimney crickets to keep the back side of your chimney free of debris and water puddling or ponding. However, you may still want to consider a chimney cricket if you have problems with water and ice accumulating behind your smaller chimney. Also, check the roof valleys for any accumulated debris, and check the condition of valley flashing.
An integral part of roof inspection is the inspection of the downspout system and gutters. You need to look over the entire length of the downspout and gutter systems and see if they are firmly attached and will handle snow. Typically, you can check the slope of the gutters from the ground, standing back from the house. Downspouts should be free-running and extended away from the building and foundation. Clogged downspouts can sometimes be detected by tapping on them. A hollow ringing sound indicates that the downspouts are clean, while a dull sound suggests they're obstructed. The more overhanging trees there are around your house and roof, the greater the chance of clogged gutters and downspouts and threatening wires. Wind, rain, and snow can break branches and take down any wires caught in them. Moreover, the build-up of leaves can become acidic and further damage roofing materials. Cleaning these parts of your home may take a couple of hours, but potential repairs to your foundation, flooded basement, ruined furniture, or even soil erosion around the house can cost you thousands of dollars, so it's best to prevent them this spring.
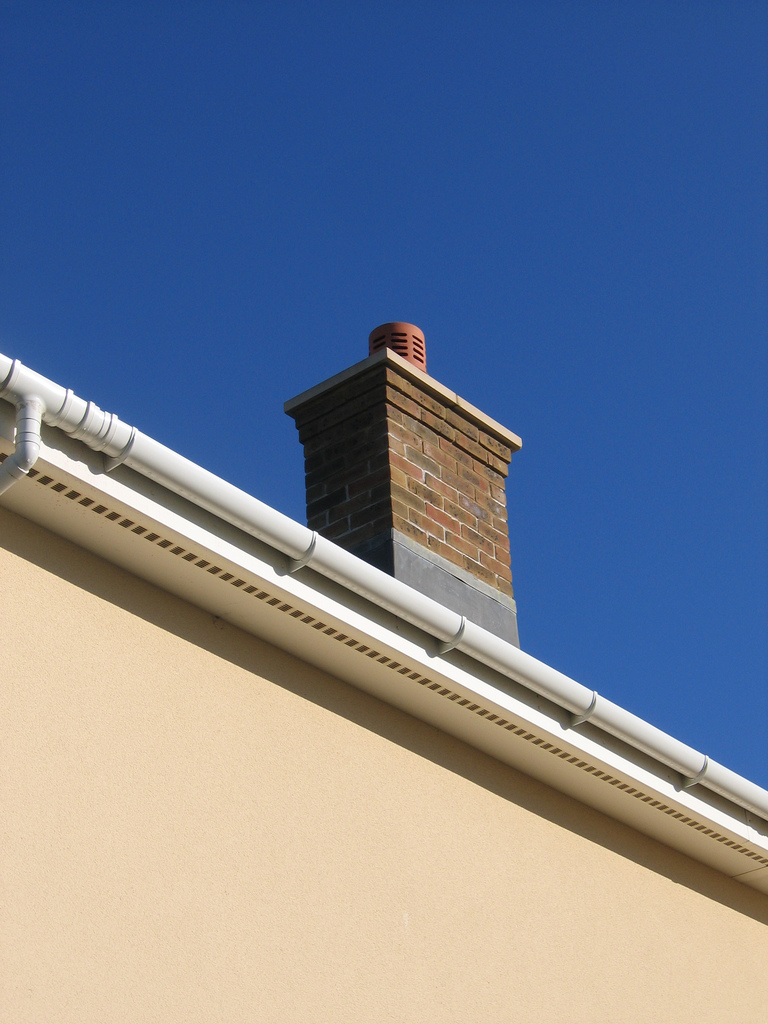
The Chimney by timjoyfamily
Visible Cracks
Cracks in asphalt or concrete on your driveway, sidewalks, or paths can not only present a tripping hazard but also cause further cracking during winter, when water freezes inside. Cracks allow moisture to enter more easily. Check for rot and insects at the sill, and look for raised mud channels, which can mean a problem with termites.
Gaps around Doors
Sometimes you may feel that the gaps around the doors are too uneven to tolerate and serious air leakage occurs in your home. In fact, approximately 20 per cent of the air that enters and exits your home does so around your windows and doors. That's why it's important to seal your windows and doors in order to reduce energy consumption and save money.
Cracked Caulk
One of the most common home maintenance projects is re-caulking. You might want to examine the kitchen, bathrooms, laundry area, and other areas near windows or doors, wall and roof vents, skylights, and also the joints where siding joins at the corners near the roof or chimney and the places where gas pipes and electrical lines enter your home. Since this process can radically decrease your energy bills and prevent moisture from penetrating into structural framing, causing water damage or mould, and also stop insects from entering your home, it should be repeated every year or two.
Peeling paint
Successive layers of paint can sometimes peel off in smaller or larger pieces. This may be caused by the original preparation, poor priming, or other factors, but you should focus on properly repairing the walls and ceilings for repainting. Peel off all loose paint from walls and ceilings with a putty knife or other thin blade to expose as much of the original plaster as possible before proceeding. Professionals usually wet-scrape the paint to avoid dust and lead-based paint floating around. Once all loose material has been chipped off, you should seal the edges of the sound, unpeeled areas with an oil-based primer. This step is critical in order to prevent the new patching material and paint from transferring moisture to the old paint. If this happens, the old paint may peel shortly after repainting. This is the likely cause of the repeated peeling experienced by the previous home owner.
Peeling Paint by pps
Once the edges are well primed, they may be filled with drywall compound or other patching material and sanded smooth before repainting. These newly filled areas and all bare plaster should be further painted with oil-based primer to ensure proper adhesion of the new paint. Once this step is complete and the primer is fully dry, you may apply the finish coats, which should remain in good condition for a long time.
Bad Grades
The golden rule is that soil needs to slope away from the house at a grade of three inches for every five feet to avoid basement flooding and other costly damage caused by rotting and insects, particularly termites (especially common when soil touches wood siding). This is particularly problematic in new homes because backfilled soil subsides. To fix this issue, you will need to add extensions to downspouts to carry water 10 to 15 feet from the house.
Water Pressure
Check your home's water pressure. While some might consider high water pressure a good thing, water pressure that is too high can cause annoying and expensive damage. To make checking as easy as possible, use a water pressure gauge. This is a portable meter that screws onto a hose bibb. It typically doesn't cost more than $15 to $30, depending on which type you choose.
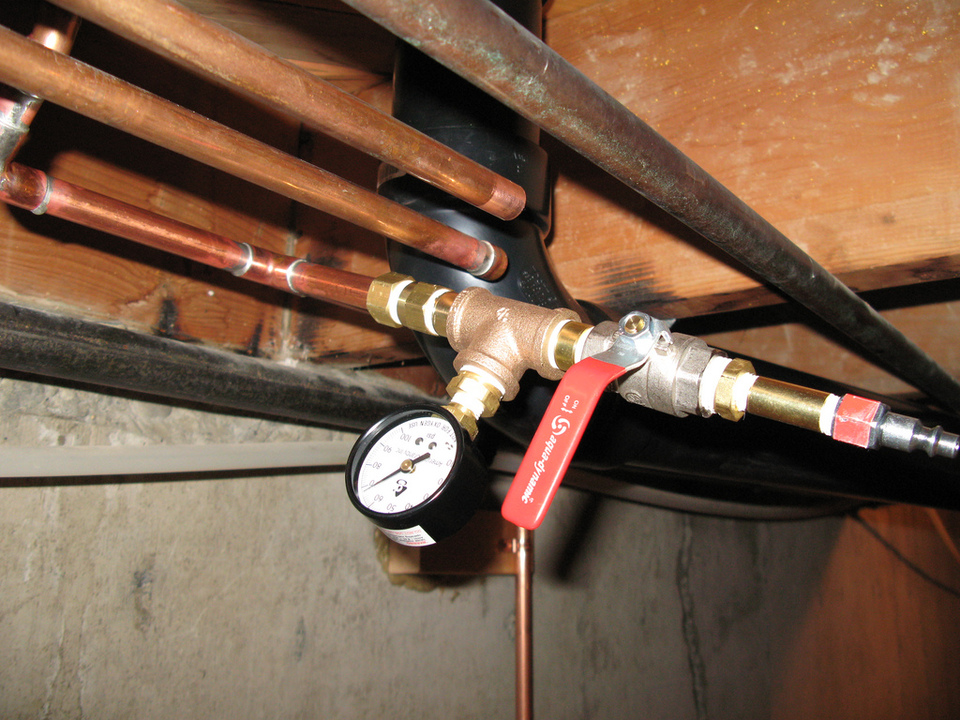
Watter Pressure by alaneyre
This device will give you an accurate reading of your water pressure. Water pressure ranging from 40 to 80 pounds per square inch (PSI) is acceptable. Low pressure (40 PSIor less) could mean a problem with the line or just sediment build-up in the faucet aerator or shower head, while high water pressure (80 PSI or more) can lead to excessive wear or damage to household appliances and plumbing fixtures, or lead to increased water usage.
The Attic
The attic is unfortunately one of those out-of-sight and out-of-mind areas you don't think of until there's an obvious problem. If you don't want to find yourself groaning, "I wish I'd thought of this earlier," check if your attic insulation is adequate. The attic may have been designed sufficiently to keep energy bills low at the time your home was built, but remember, as time moves on, increased efficiency may be your best option. In fact, if your home is completely uninsulated or under-insulated, you could be paying up to 20 per cent more than you should on your home's yearly energy costs.